


Top 80 redrive rebuild
by Had Robinson
updated October 12, 2024
Introduction
Propeller strikes can damage the redrive, especially when it happens at full throttle. The most common damage is a bent/warped hub which can be replaced without a redrive rebuild. The hub may look OK but it will cause vibration, even with a perfectly balanced propeller. Less common is breaking off one of the flanges on the redrive which hold it to the engine. I do not think it is possible to bend the propeller shaft and, to date, I have never encountered it.
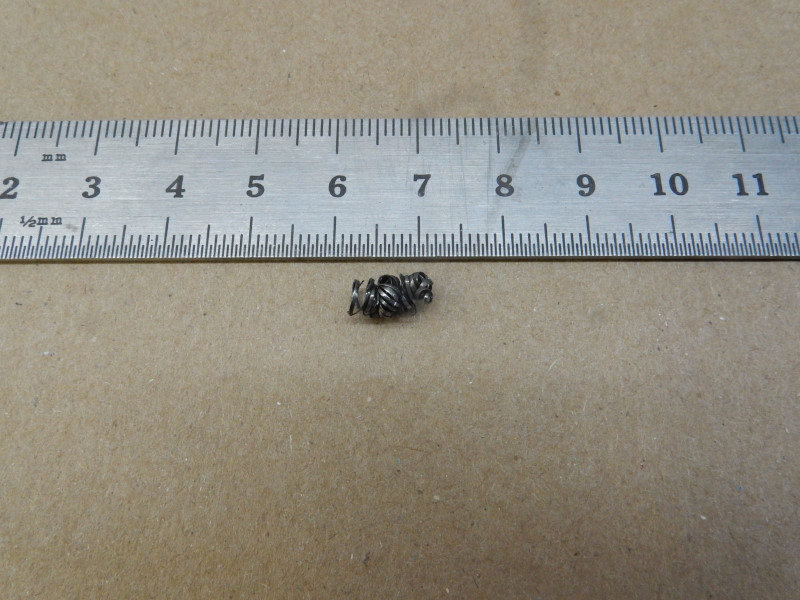
When lines get caught in the propeller, they will wind around the shaft and push the seal in, ruining it. If the propeller shaft seal is damaged and leaking, it can easily be replaced without opening the redrive.
The bearings on a redrive rarely, if ever, wear out. The most common reasons for rebuilding a redrive is because of a damaged case, a leaking clutch-bell shaft seal, or a leaking case. If there is any question about the condition of the bearings i.e. the redrive was run without oil, they can easily be evaluated.
Despite that the fact that the Top80 redrive has helical gears, it is still noisy. Pilots may notice that the gear box is more noisy when they spin the propeller in the reverse direction but not in the other. This is due to normal wear of the loaded sides of the teeth on the gears.
If the redrive is of the older type which uses grease instead of oil and needs to rebuilt, you may go to the Mark Kubisch page. Be *certain* to read my notes about some errors Mark made in disassembling the older units. Alternately, pilots would best follow the directions given on this page and then consult Mark's pages on the quantity and type of grease to be used.
Splitting open the redrive case can be easy if it is new and has not been exposed to corrosive air i.e. the air near an ocean. The potentially most difficult job is removing the (4) 5mm button-head screws on the clutch side of the redrive case. These screws can be very difficult to remove.
Special tools, items required
- An ordinary kitchen oven (get permission first from your woman to use it, life will be easier later).
- propane torch (oxyacetylene may also be used but it is much easier to overheat parts.)
- (4) 5mm x 90mm socket head screws (these can be ordered from Bolt Depot)
- floor press (a vise may be used with woods blocks)
- snap-ring pliers
- dead-blow or plastic headed hammer
- the special tools listed on this page
- Permatex Ultra Grey RTV sealant (or equivalent) should be used to seal the case halves.
Parts
Redrive parts are available from Miniplane-USA. Unless you have general experience in engine overhaul, I do not recommend other internet sources for parts. There are many sub-sets of ordinary bearings and seals which most pilots would find confusing. The Top 80 specs page has some details on the various bearings and seals used in the engine but they, of course, want you to buy Italian made parts which, unfortunately, are not always of good quality.
Before you begin this procedure, preheat the oven to 190ºC (380ºF).
NEVER USE ANY KIND OF THREADLOCK ON FITTINGS USED TO ASSEMBLE CASE HALVES!
Rebuild steps
1. Remove the hub – Follow all of the steps on this page. The hub and propeller shaft must always be evaluated. If you do not have or know how to use the proper tools to do this, buy a new hub. This page also has the steps on how to CORRECTLY install the hub so that it is not ruined.
2. Remove the (6) case screws – Often the (4) pan-head case screws are frozen and very difficult to remove. This is because Miniplane factory technicians (among others) will sometimes glop sealant everywhere when assembling the case halves, getting sealant into the threaded holes. Attempts to force them will only ruin the screw head. If you have an impact wrench, put it on the lowest setting and attempt to remove the screws. Do not be tempted to use any setting but the minimum. If the screws come out OK, proceed to step #3 below. However, if you have difficulty removing the screws, follow the directions in the following paragraph.
To be safe, soak the (4) pan-head screws in penetrating fluid for a few hours or, better, overnight. Apply heat with a propane torch to the threaded portion of the case for 90 seconds. If they do not move with 3.6 Nm (32 in lb) or less torque, more soaking with penetrating fluid is required, wait a few hours and apply heat again for 1 minute. This may have to repeated 3-5 times if you do not want to risk ruining the screw and have an ugly job removing its remains. Between sessions and soaking, place the bottom of the threaded hole on the flat of a vise and strike the pan-head screw a light but smart tap with a ball peen hammer. This will help loosen things. Proper use of heat and torque are KEY factors in taking apart engines. THESE KINDS OF PROCEDURES REQUIRE PATIENCE!

If the above does not get the screw to move, use a Dremel with a cut-off wheel to make a slot in the screw into which a heavy duty screwdriver can be inserted. Secure the redrive, push as hard as possible on the screwdriver and, using an adjustable wrench in the other, gently twist the square shaft of the screwdriver. This may ruin the screw but it almost always gets a frozen screw out. An ordinary screwdriver has a greater bite and will achieve a much greater torque on the screw than a small hex bit. Why Miniplane and others use pan-head screws so much is anybody's guess? These should all be socket-head screws with washers underneath.
Rarely, a screw can be so stuck/corroded in place that the head of the screw must be removed, the stub grasped with Vice Grips, heat applied, and a judicious move with the Vice Grips made. Heat and penetrating fluid are the magic bullets to get out stubborn screws and bolts.
So-called "easy-outs" are never easy and rarely work except where the stud is broken flush with the surface and can be easily turned. If the threaded fitting is frozen in the socket, the "easy-out" will expand the hole in the stud and make it even more difficult to extract. I repeat: penetrating fluid, heat, and patience are the KEYS to removing frozen fittings. Liquid Wrench is the better fluid for this kind of problem but the fitting will need 24 hours to soak.
For the most stubborn screws/bolts, pilots should consider using this ingenious Japanese hand tool, the Vessel Impact Driver, to remove them (this tool is avai. It has a 1/2" drive which can take any adapter or socket or hex bit. This tool will safely remove screws and bolts that an ordinary impact tool will not.

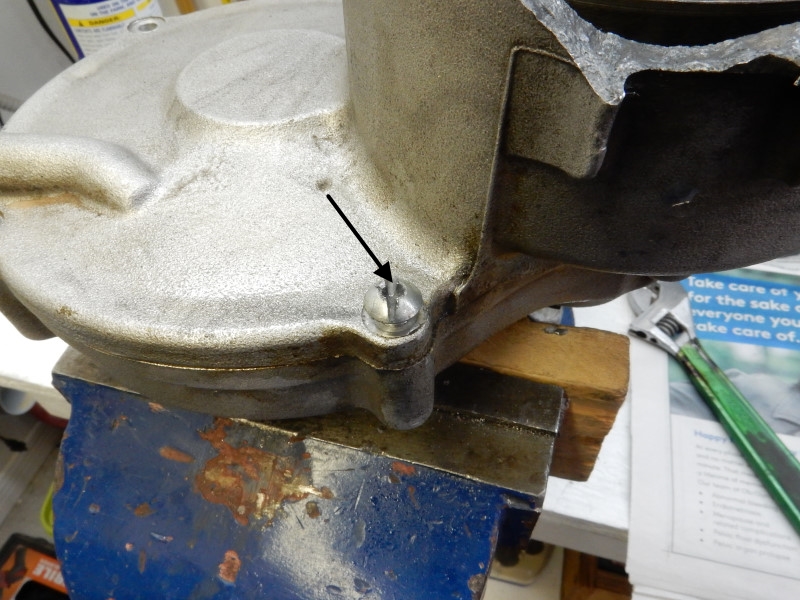
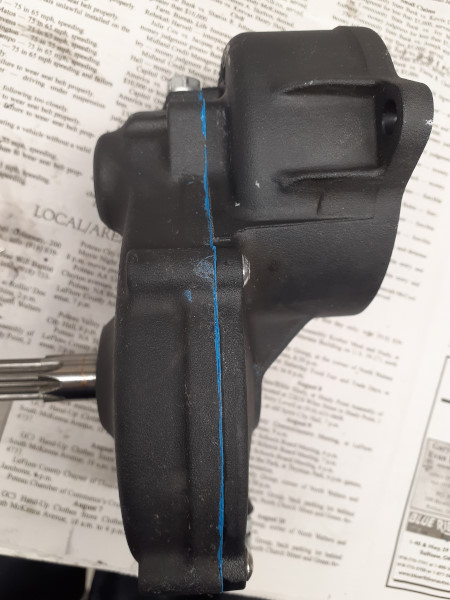
The redrive in the photo below had not been opened since it came from the factory. The Miniplane factory technician had glopped sealant all over the case halves when he assembled it. Of course, sealant got in the threaded holes and, when the screws were inserted and tightened, the sealant became like cement and prevented the screw here from being removed with ordinary tools and heat. Fortunately, the screw did not have to be drilled out. A slot (black arrow) cut by a Dremel cut-off wheel was enough to get it out. Unfortunately, heat has less effect on fasteners glued in holes with sealant.
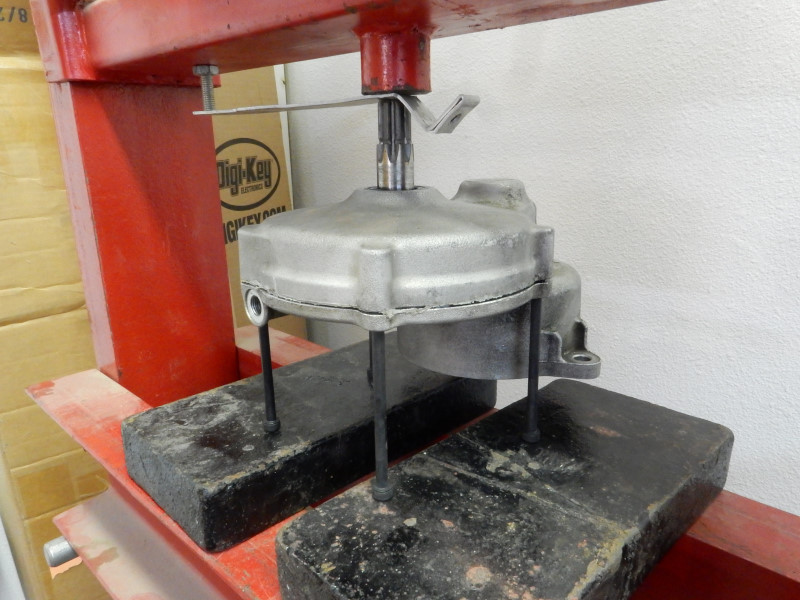
3. Split the case – Install the (4) 5mm x 90mm screws in the case. Place the redrive in the press as on the photo. Actuate the press with only your hand because you are better able to feel the movement of the press. The piece of scrap aluminum between the shaft end and the press is to protect the end of the shaft. Always put a soft piece of metal between hardened surfaces and threaded shafts when pressing or striking them.
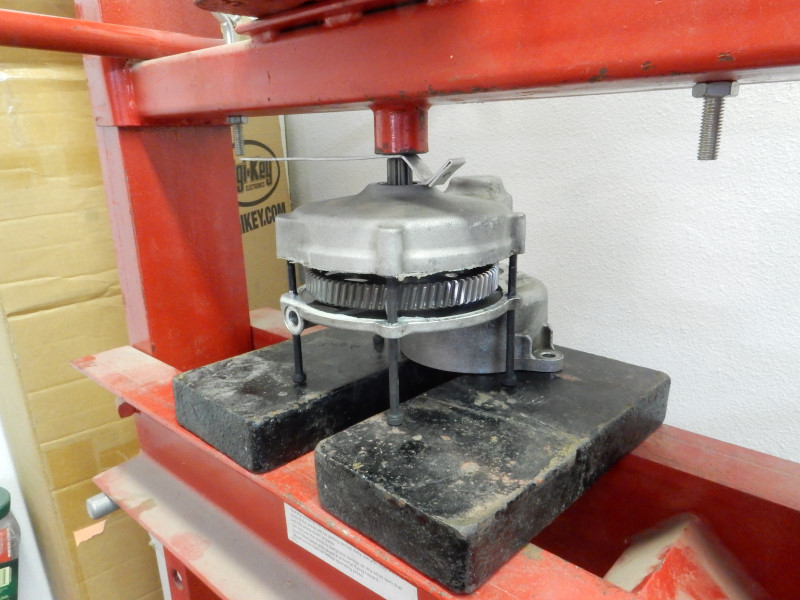
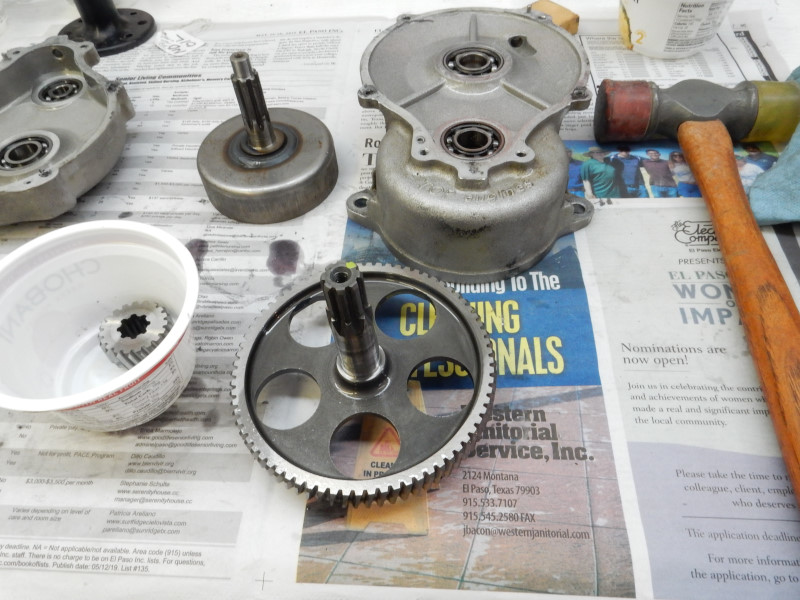
Here is what the redrive looks like after the halves are separated.
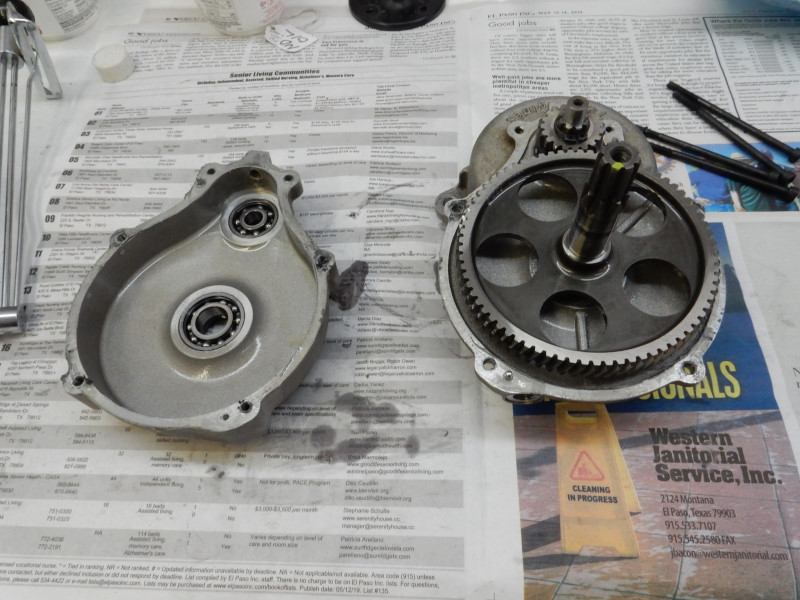
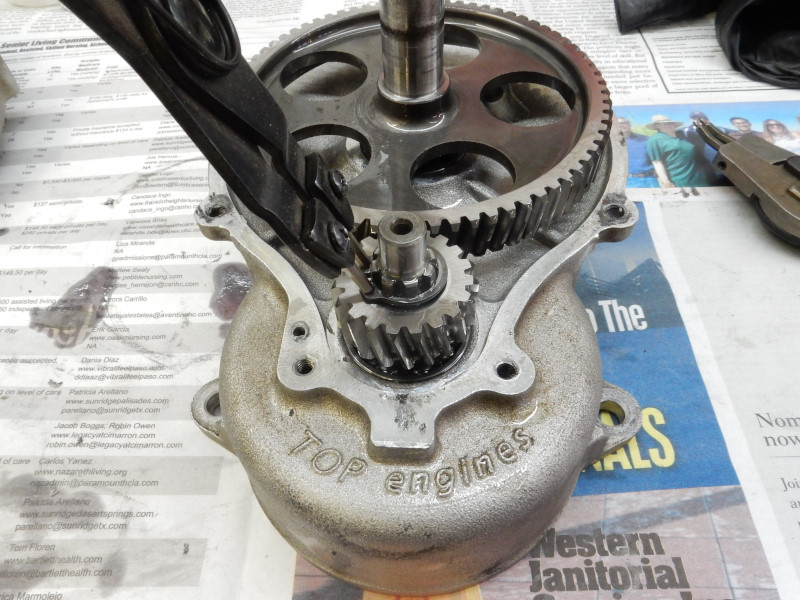
4. Remove the pinion gear and the clutch bell shaft – Remove the snap ring that holds the pinion gear on the clutch bell shaft. Lift the gear off the shaft with your hand. It should not require a puller. While holding the assembly, use a dead blow hammer and gently tap the end of the clutch bell shaft. If the pinion gear is a little sticky (rare) and hampers the shaft from moving, place the redrive on some wood blocks so that when the clutch bell shaft drops, it will clear the blocks. Use a dead-blow or plastic faced hammer to gently tap the shaft with the assembly placed on the blocks. Both the gear and the shaft should both become free. (30) seconds of heat from a torch can also help.
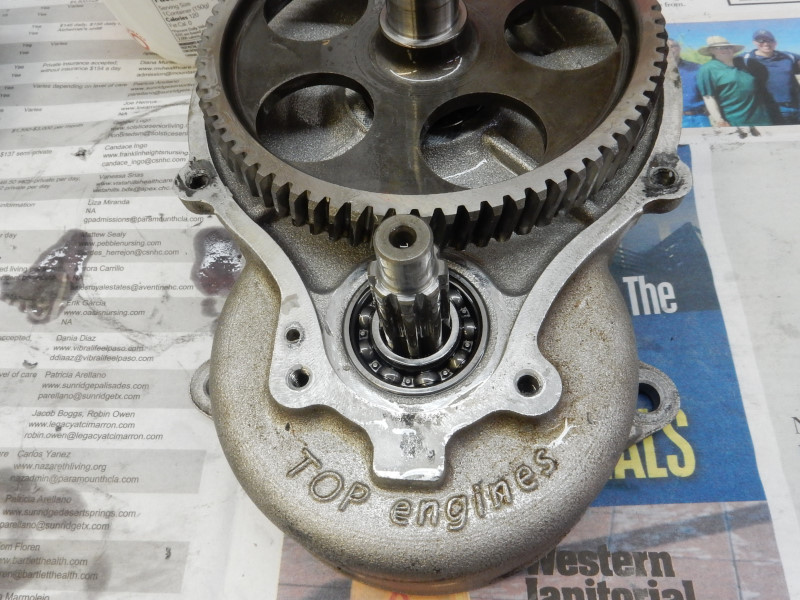
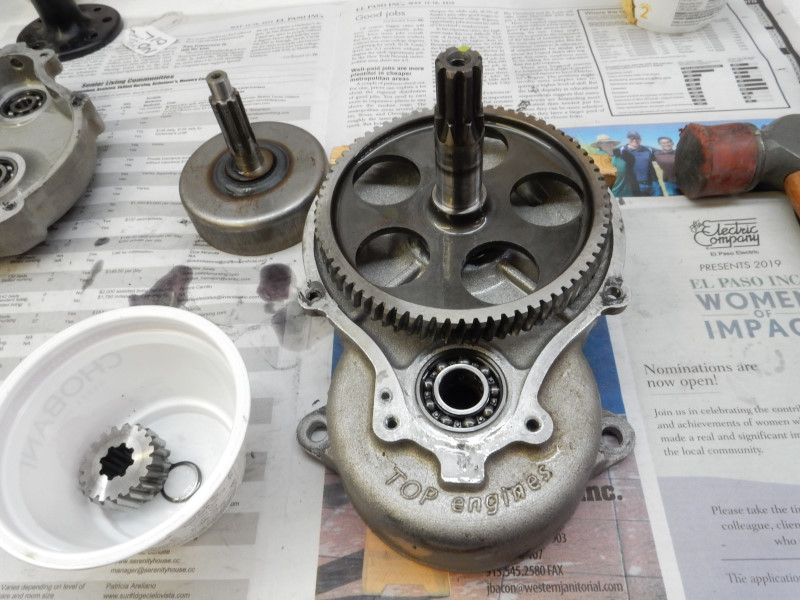
5. Remove the propeller shaft and main gear – Hold the end of the propeller shaft with one hand and gently tap each side of the exposed edges of the outer case half with a soft-faced hammer. The case should fall away from the shaft. If the shaft is stubborn, use (2) thin slats of wood (e.g. a cedar shims) to pry out the gear. DO NOT USE screwdrivers as you will most likely damage or bend the face of the redrive. At this point you should have (4) bearings and (2) seals installed in the case halves. Sometimes the bearing will come out with the propeller shaft which is not a problem.
6. Go to the bearing removal page and complete the steps given there. You cannot replace the bell shaft seal without removing the bearing..
7. After the bearing are removed, remove the (2) seals. Use a socket or drift just smaller than the seal bore and press it out (best) or tap it out with a dead-blow hammer.
8. Make sure that the (2) centering pins are present. The pins must be present to ensure that the case halves are properly aligned. If one or both are missing, they will have to be ordered from Miniplane-USA. The case halves must not be assembled without both pins in place.
9. If new bearings are to be installed, consult the bearing removal page for installation instructions. Bearings should NEVER be pressed into aluminum bores. The respective case half must be heated first per the above instructions.
10. Install the new seals – Always put copious amounts of anti-seize or petroleum jelly (Vaseline) on the parts of the seal that contact the shaft, including the shaft itself. If the shaft rotates with a dry seal, it will quickly ruin the seal.
11. Clean the mating surfaces of the case halves of all old sealant with a razor blade. Use mineral spirits or brake cleaner (best) to remove all traces of oil. Blow dry with compressed air. Now we are ready to reassemble the redrive with new parts, as needed.
12. Install the clutch bell shaft by pushing it in with your hand.
If it will not go on easily, do not press or tap it in because the shaft may push the bearing right out of the case half. Elevate the clutch bell a 1/2" (12mm) or with a large socket. Start case half with the bearing and manually push it on as far you easily can. Use another long socket with ID greater than the shaft and tap the bearing on to the shaft with a a dead blow hammer. The shaft should be pushed on just enough for the pinion gear to clear the snap ring groove in the shaft. If you push the shaft on too far, it jam up against the seal and maybe damage it. This technique will prevent the bearing being push out of the case half.
If there is any clearance between the snap ring and the gear, you can gently tap the end of the shaft back out until the snap just contacts the gear.
When installing the propeller shaft in the engine case halve, start the shaft-gear into the bearing and then, with both hands, firmly squeeze the gear evenly. The shaft should make a "dink" when it is fully inserted into the bearing. A plastic or dead-blow hammer may be needed to send the shaft home.
Make certain everything turns easily before continuing. It is important to inspect everything carefully before assembly. A Miniplane factory technician left this chunk of potentially damaging thread cuttings in the propeller shaft screw hole. Had it cross-threaded with the propeller mounting screw, the screw might never have come out.
13. Apply the RTV to the mating surface of the prop side case halve. Only a thin coating of sealant should be used. It is best applied with a clean finger protected with a nitrile glove. Put old screws, toothpicks, cotton swabs or anything that will keep the sealant OUT of ALL holes while applying the sealant. Any sealant on the threads will lock the screw and it will be very difficult, even with heat, to remove it later. Sealant in the centering pin holes will prevent the case halves from coming together completely. Work as quickly as possible.
14. Manually squeeze the case halves together. Immediately install the (6) screws and tighten them *by hand*, in a cross pattern so that the case halves are brought together evenly around the entire circumference of the case halves.
WAIT ONE HOUR
After the waiting period, use a ratchet to further snug the screws evenly. It is a good idea to torque in stages i.e. first 50% then 100%. The final torque of the (2) 6mm screws is 10 Nm. For the (4) 5mm screws it is 4 Nm. Make sure that the redrive shafts turn easily by hand.
When the sealant is applied correctly the final result looks like the photo below. Most pilots do not thoroughly clean the case halves nor do they apply the right amount of sealant, usually way too much.
It is always a good idea to wait overnight before leak testing, adding lubricant, or putting the redrive into service. At a minimum, wait (4) hours. This will allow the sealant to properly cure and seal the case halves.
15. It is a good idea to test the redrive for leaks, if possible. Tools: a pop-off gauge, a standard 1/8" barb x 1/8" NPT brass fitting, Teflon tape, and a short 6mm bolt. The brass fitting is tapered (NPT) and should be inserted into the oil fill opening *hand tight* only. It may leak air slightly but this is not important because we do not want to expand the machined opening in the redrive. Note: pipe sizes internationally are metric but are actually the exact equivalent of the various Imperial sizes. Put some Teflon tape around the base of the 6mm bolt and screw it into the prop shaft. It is a hollow shaft and must be stoppered or the air inside the redrive will leak right out.
Use the pop-off gauge to pressurize the redrive to 2-3 PSI. The gauge should hold steady (or slowly lower due to leaking around the fill opening). Immerse the entire redrive in a pot of water and look for bubbles around the case halves, the prop shaft seal, and the clutch bell seal. You will have to rotate the redrive in the water so that the clutch bell faces up to be sure the clutch bell seal does not leak. At all times, be certain that you maintain 2-3 PSI in the redrive. If it goes to zero and there is a leak, water will enter the redrive. A bubble every 2-3 seconds around the prop shaft seal can be ignored, if the pilot chooses. These engines are leaky anyway and a little more oil here and there will not matter. Here are (2) videos of a leak test:
15. Check that the redrive fill plug valve is functioning properly. If it is clogged or jammed, pressure can increase inside the redrive enough to cause the shaft seals to leak or blow out the RTV sealant between the case halves.
16. Reattach the hub.
17. Add oil
18. Reattach the redrive to the engine. It must be aligned properly when it is reattached or the clutch will drag.
![]()

