


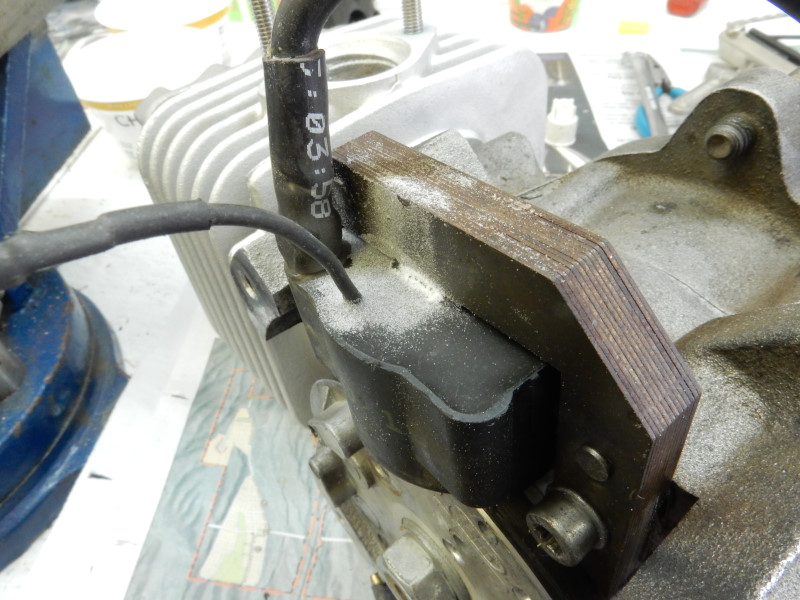
Loose ignition coil
by Had Robinson
All paramotors have at least one thing in common – they all have extreme vibration when running. If pilots keep the same engine for a long enough time, they can see the effects of this vibration. Springs, housings, wire, starters, etc. loosen, break, and/or wear out. This includes the coil.
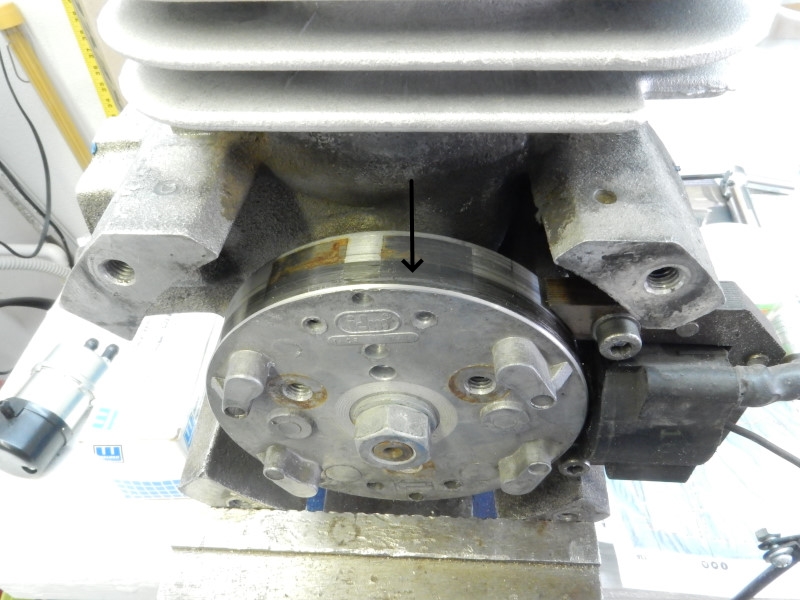
In this video of a loose coil, the iron core of the coil has slowly eaten away the inside of the coil itself. As the coil became looser and moved around more, it actually began to rub against the fly wheel (see photo below). It did particularly harm anything at this point. However, if the coil is not repaired or replaced, the fine wiring of the coil will eventually come in contact with the iron core of the coil assembly or the surface of the flywheel and short the coil out.
Ignition coils virtually never go bad if they are not abused (turning the crankshaft without grounding the secondary wire via the spark plug either installed or placed firmly against the engine). If the coil functions perfectly, why replace it? Here is how to fix it.
Repairing a loose coil
Do not perform this repair unless you are certain that the coil is in good condition.
Special items needed: (1) tube of non-gel cyanoacrylate glue (e.g. Super Glue) and some baking soda. The glue must be able to flow freely into the space between the coil and the iron core.
1. Refer to the ignition coil page for the steps required to remove the coil.
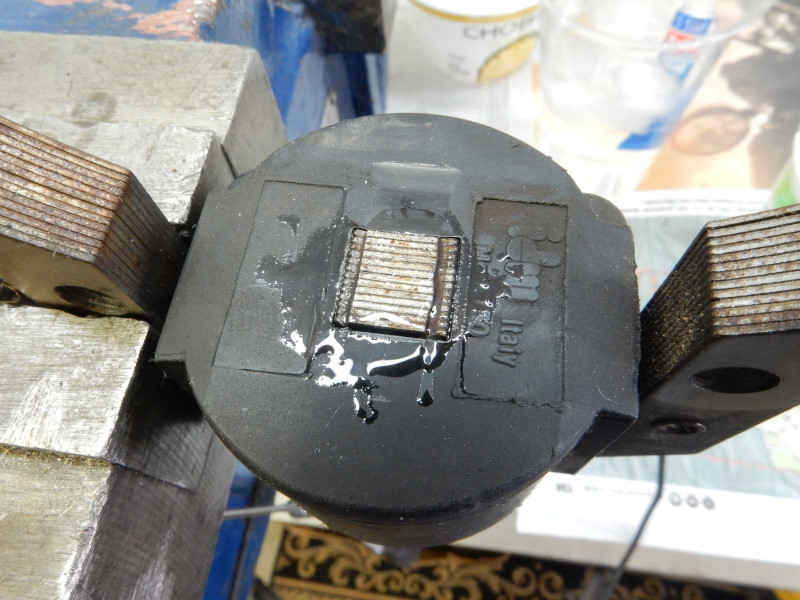
2. Sprinkle baking soda around the outside center of the coil (where the iron core enters the coil). With one hand, squeeze the coil firmly against the iron core and hold it. This must be done so that the coil does not contact the flywheel once the glue has filled the space between the coil and the core. Holding the coil against the core, dribble some glue around the space between the iron core and the coil. The purpose of this is to SEAL this end of the coil so that when copious amounts of glue is dribbled into the flywheel side of the coil it does not run out the other side. When the glue contacts the baking soda, it will instantly cure and should hold the coil in the correct position.
3. Turn the coil over to expose the flywheel side. Dribble enough glue into the space between the coil and the core to completely fill it. You must be sure to get the space between the coil and core COMPLETELY filled with the glue. Do not be concerned about the mess as it is not important. You cannot use gel type glue because it will not run down the tight space between the core and the coil.
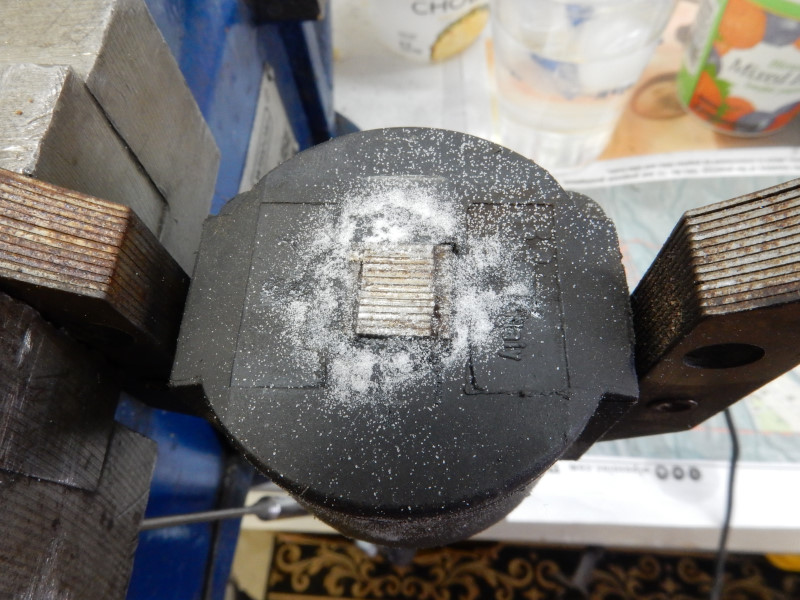
4. When it is certain that the space if completely filled, sprinkle some baking soda around the core. This will instantly cure the glue around the exposed core. The glue that is between this side and the other will still be in a liquid state for a few hours. The entire coil must be kept in the position shown below and not moved or disturbed so that the glue will cure and harden properly inside the coil. Notice in the photo below that the iron core slightly protrudes above the coil itself. DO NOT RUN THE ENGINE FOR AT LEAST 24 HOURS. The glue must be absolutely hard or it will pulverize due to the intense engine vibrations. Excess baking soda can be wiped off. Do not worry about any excess flue around the core. It will quickly wear off if it should harmlessly contact the flywheel.
5. Reinstall the coil. Refer to the ignition coil page for the steps to do this. That's it.
![]()

