


Finger screw modification on the Top 80
by Had Robinson
updated November 15, 2023
Having to replace expensive screws in order to perform routine ignition, cooling fan, or flywheel service on the Top 80 is a poor option. I have tried many ways to get an end-wrench or a crow-foot on them in order to properly torque them down on reassembly but have not been successful. The clearances are just too small. The result will always be that the screws are not tight enough and the screws/pawl assembly will likely be bent/damaged. The screws can be loosened but it is impossible to reinstall them to the correct torque so that the cooling fan will not move relative to the fly wheel. We have received engines which required replacement fans including flywheels because of attempts to tighten the finger screws,
If you prefer not to do the modification yourself, we can supply a set of modified finger screws for $34 postpaid 1st class U.S. If you send us your used screws, the price is $19 postpaid 1st cCass U.S. To order, contact us and we will send an invoice. The set contains (3) finger screws, (3) 3mm x 8mm screws, and (3) 4mm zinc plated washers. Note: The screws we supply may be from repaired engines. We do not modify new screws unless we have to. The screws are custom machined in our shop.
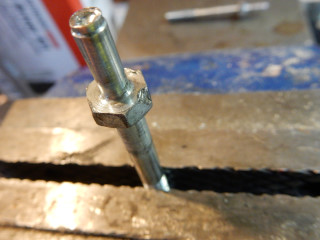
Damaged finger screw (hex bolt) from an attempt to reuse finger screws without modifying them.
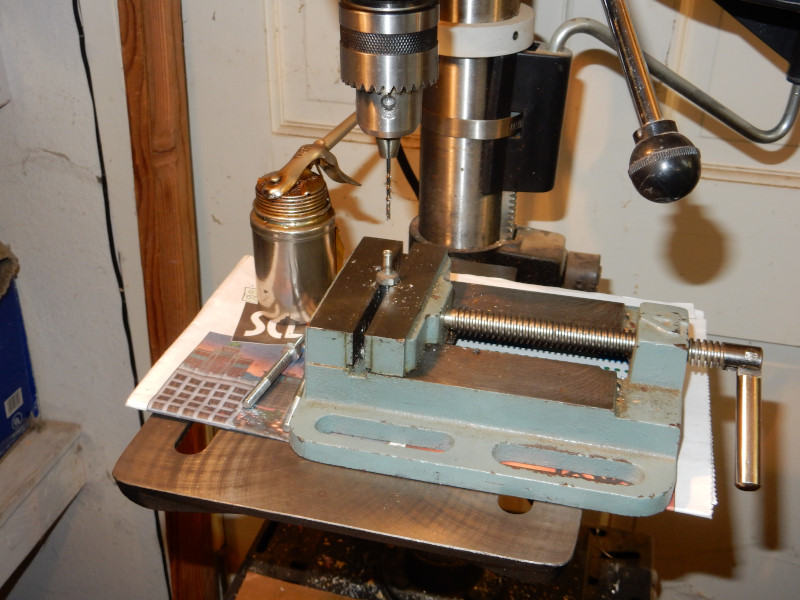
A 10mm deep socket must be used when re-installing the screws. The cooling fan spins at 9K+ RPM and the screws must be properly torqued.
Here is a permanent way to be able to re-use the screws. Average mechanical skills and the knowledge of how to drill and tap a hole are needed. Search the Internet for detailed instructions on how to do this.
Needed items:
- Drill press
- 10mm deep socket
- Cutting fluid
- Dremel type tool
- M3 x 0.5 tap set (taper, plug, and bottom taps) – only the plug and bottom taps are used
- 2.5mm (#40) drill bit
- (3) M3 x 8mm screws
- (3) 4mm zinc plated washers (if needed)
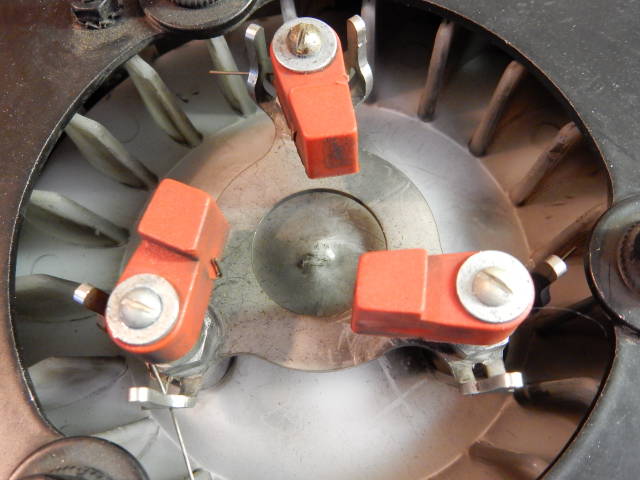
1. Before removing the screws from the engine Use the Dremel tool with a small grinding stone to remove the peened tops of the screws just down to or a little before the top of the washer. You can also use a small file to do this. Do not grind the washer.
2. Remove the washers by grabbing them with a pair of pliers and rocking them off the tops of the screws. They will be reused. Remove the pawls and the springs.
3. Remove the screws a.) Older model Top 80's: Put the engine in a horizontal position and remove the screws one at a time to do the mod. If all of the screws are removed at the same time, the spacers between the cooling fan and the flywheel on these older models will slide out of alignment. If that happens, it will be difficult getting them all back in the right position without taking off the cooling box. b.) Newer models of the Top 80 have the spacers permanently attached to the cooling fan so you can remove all of the screws at the same time.
4. Make sure the washers will fit over the end of the bolt and rest on the shoulder of the machined end. You might have to take a small file to clean up the ends so that the washers go on and off easily.
5. Drill the holes in the ends of the screw 9mm deep with cutting fluid. The finger screws are indented at the pawl end so it is easy to center drill the holes for the new screw. Do not over-cut the hole's depth or the finger screw may lose some of its strength.
6. Tap the holes The hole must be tapped in (2) stages. Use the medium (plug) and final (bottom) taps. The first tap is not needed because the finger screws are made of soft steel. Use cutting fluid. Clean the new holes thoroughly with brake-cleaner & compressed air. The modified finger screws below can be reused for the life of the engine.
7. Install the modified finger screws First, put the screws through the holes in the pawl holder and then add the spacers. Put everything through the holes in the cooling fan and line up the screws with the holes in the flywheel. Only thread the first (2) screws a few turns into the flywheel. The tolerances are very close and it is difficult to thread the 3rd screw. Use a piece of wood or a tool to firmly press down on the top of the 3rd screw while using an end wrench to turn the screw. You will know when it begins to enter the threaded hole in the flywheel. Now you can use a 10mm deep socket to tighten the screws down. Do the tightening in stages. It is critical that the cooling fan not be distorted in order to minimize vibration. Final torque value is 10 Nm. Do not use threadlock on the finger screws.
8. Reassemble the pawls and springs The spring goes on first. Put the elongated tail of the spring through the slot in the pawl holder so that it is CCW of the screw. Place the pawl on the screw so that it is between the CW slot of the pawl holder and the right angled tail of the spring. Place the original (or new) washers (4mm, zinc plated) on the ends of the modified finger screws. THEY MUST BE FLUSH WITH THE RIDGE ON THE FINGER SCREWS. Use threadlock on the new 3mm screws and tighten them until resistance is felt. Turn them an additional 45º. The threadlock will keep the screws in place, not the application of torque. DO NOT OVERTIGHTEN THESE 3MM SCREWS.
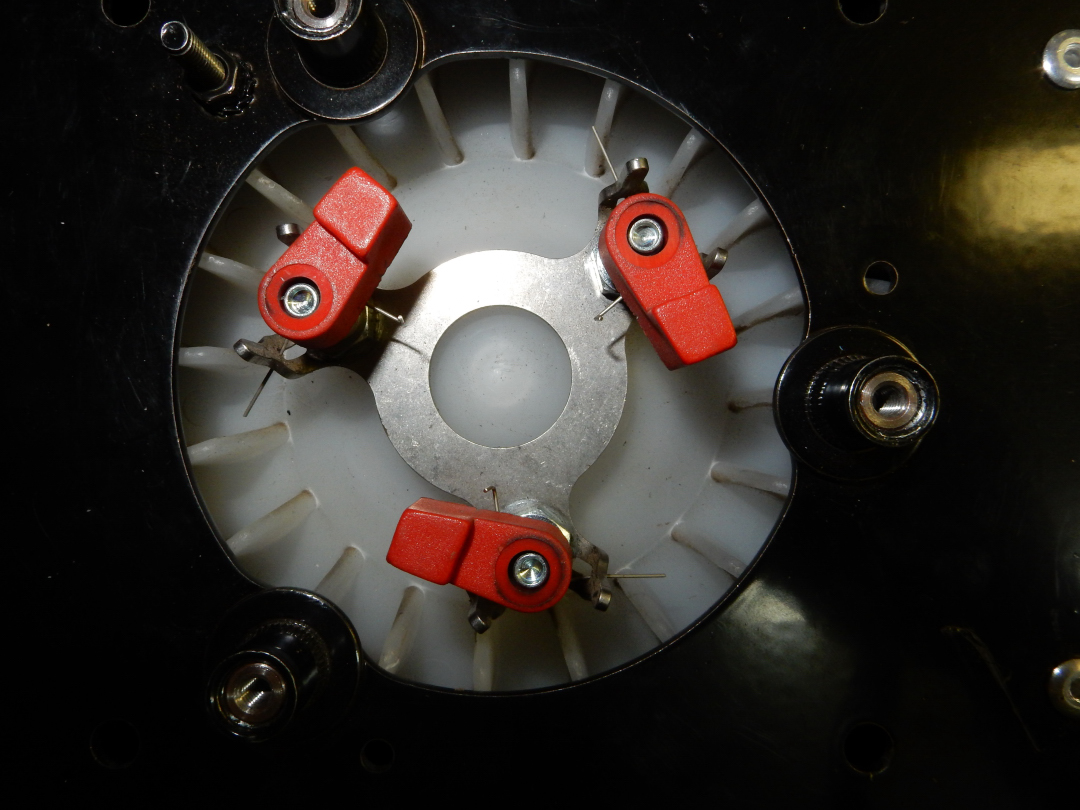
Here are some photos of the the finger screw, starter pawl, and spring detail.
The finger screws in the photo below are new. The washers have not been installed. In this scheme, the washers must be held down against the pawl and a small cold chisel and hammer are used to split open (peen) the ends of the finger screws in order to hold the pawls and springs.
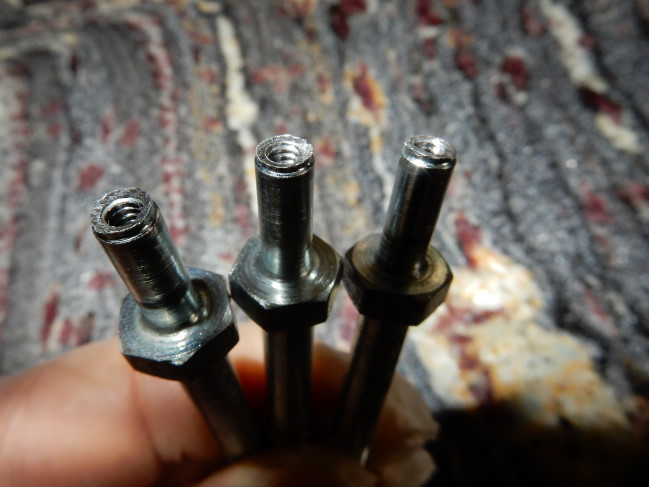
The photo below shows the modified finger screws.
9. Attach the starter Use some fine line to hold the pawls in place when reattaching the starter. The pawls must be firmly held in the full CW position with the line. The 4mm screws that attach the starter to the cooling box do not need threadlock because they have lock washers and will not loosen.
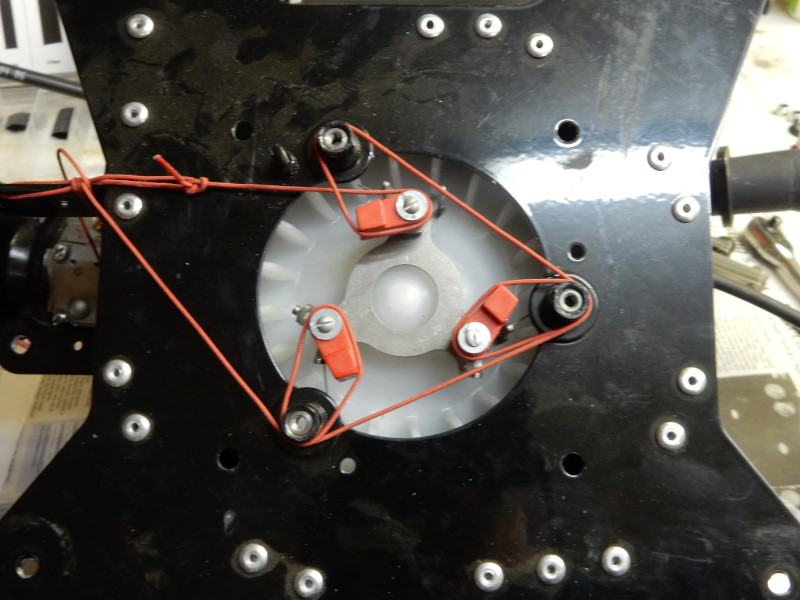
Miniplane's design of the Top 80 starter is much more durable than most of the other paramotor starters. Anything that can move on a paramotor will vibrate severely. The pawls and springs spin at such a high speed that they do not move – and so do not wear out like in the Polini and other motors.
10. Test the starter When attaching the engine to the frame, be sure to use threadlock on the (4) button-head screws as you do not want the engine to become detached while flying.
11. Go fly safely – you are done.
![]()

