


Topend 100 hour maintenance for paramotors
by Had Robinson
updated October 28, 2024
The steps given here are typical for the 100 hour maintenance required on most paramotors. These include cleaning (or replacing) the piston, clearing the decompression hole (if there is one), replacing the upper connecting rod bearing, and replacing the wrist pin. If you have never taken a small engine apart e.g. a lawnmower, be extra careful and sure you understand everything presented here. Modest skills and experience are required. Before doing this task, take a look at these tips on the mechanics of a rebuild (from MCB Performance).
Generally, the top end maintenance should be done every 100 hours. However, some engine manufacturers recommend this maintenance at 150 or 200 hours. Check the manual for your engine on when to do this critical maintenance. This maintenance is important because deposits that build up on the piston and other top end parts do not conduct heat well and their presence may cause engine overheating. The deposits also raise the compression ratio which can cause engine knock (from pre-ignition of the fuel mixture) and overheating. Both of these issues lead to premature wear and even damage to the engine.
Most important of all, the upper connecting rod bearing and wrist pin (or "rod") are among the first engine parts that wear out and why this scheduled maintenance is so important.
A FAILURE OF THESE PARTS WILL DESTROY THE TOP END OF THE ENGINE AND MAYBE THE ENTIRE ENGINE. Don't ask how I know this....
It is not too difficult to perform this important service because the engine is only partially disassembled. That is, the head, cylinder, and piston are removed. Always take plenty of photos and notes of the head and cylinder gaskets BEFORE removing them. They often have a specific "up" and "down" side. Some engines use O-rings for the heads and not flat gaskets. If you are new at this, watch some videos on the Internet. Small motorcycle engines are the closest thing to a paramotor. Take your time. Take photos as you disassemble the engine then, if you are not sure how things go together, you have a reference. If things do not fit together easily, you are probably doing the task incorrectly.
The following parts are generally required and are available from Miniplane-USA.
- carburetor rebuild kit and spark plug
- cylinder and head gasket set
- upper connecting rod bearing
- wrist pin ("rod")
- circlip set - NEVER reuse circlips
Here is a list of the parts needed (including the numbers for the Top 80). Other engines are similar but you will have to research the part #'s.
- NGK spark plug CR9EB (new style) or BR9ES (B9ES also OK)
- Walbro carburetor Kit M10V5K
- piston bearing M13/4 (19a)
- piston rod (a.k.a. wrist pin)
- head O ring M13/5A (11a)
- piston rod springs (a.k.a. circlips) M13/4A (18a)
- cylinder gasket Kit M13/6 (15a)
These special tools are needed for this job:
- spark plug hole thread chaser
- compression tester
- hot air gun
- infrared gun (optional but a cheap one from Harbor Freight will save some time)
Perform the following steps on the Rebuilding a paramotor page: #'s 1, 5, 6, 8, 9, 13, & 14
Read through the notes below for additional tips and help, if needed.
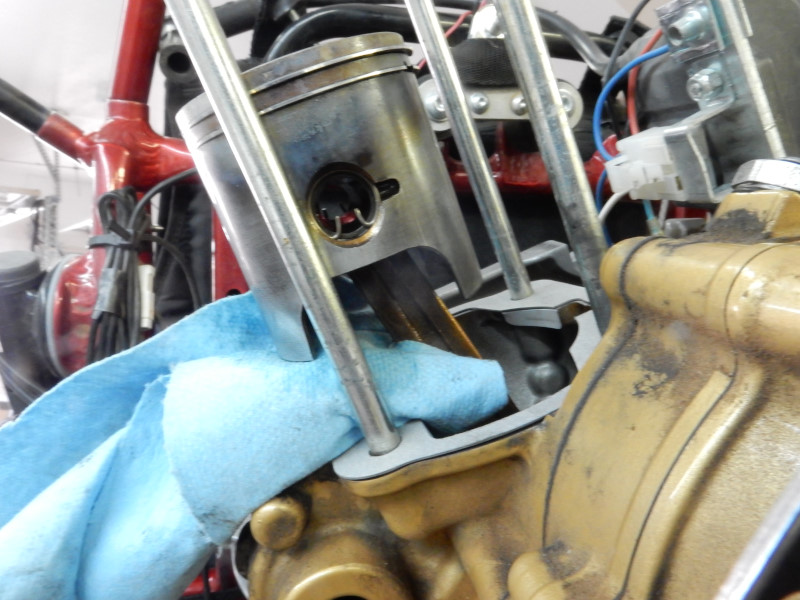
After the head and cylinder are removed, the circlips that hold the wrist pin in place can be pried out using a small screwdriver or pick.
Use the hot air gun to heat the piston just hot enough so that you cannot touch it (less than the boiling point of water). It is handy to have one of the inexpensive infrared gun from Harbor Freight. The piston pin will easily slide out if the piston is heated properly.
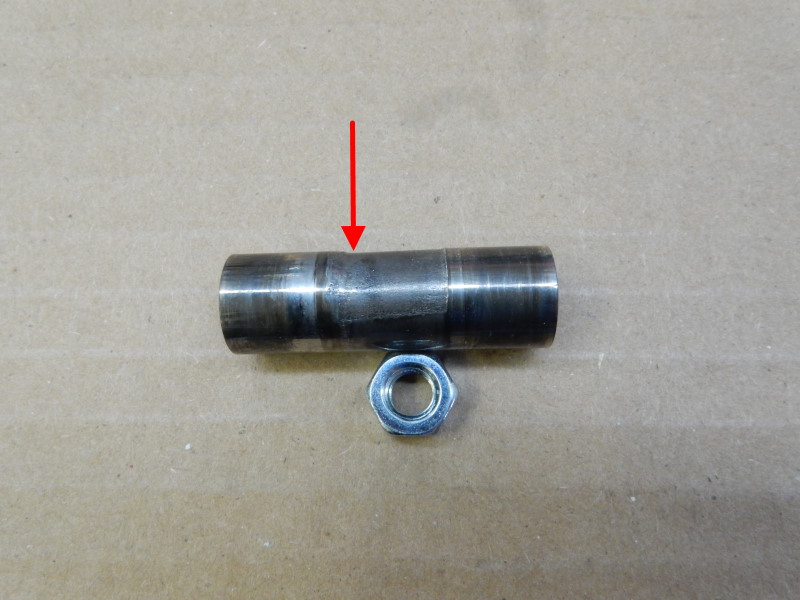
Examine the wrist pin for any wear with your fingers. (I have placed a nut just below the wrist pin to keep it from rolling off my bench.) If there is the slightest ridge or depression anywhere on the wrist pin, you will have to replace it (usually along with the piston, rings, and bearing). Use a micrometer or a digital caliper, if possible, to ensure that there is no wear on the pin. The pin wears on the bottom side (relative to the cylinder and piston). The worn out Top 80 pin below had a center diameter of 11.7mm (new is 12mm) when the un-worn parts of the pin contacted the bearing cage and broke it apart. Those parts got sucked into the cylinder and destroyed the entire top end. The wear is plainly visible on the pin.
Carefully examine the connecting rod for play in the lower bearing. The bearing wear page has some notes on how to do this. It is rare that the lower rod bearing will have excessive play if the engine has less than 400 hours. If there is play in this bearing, the engine was probably abused in some way e.g. run with a too high oil mix ratio, no oil, or in a beach environment.
Examine the cylinder wall for the presence of honing marks. If these are not clearly visible over most of the cylinder (90%), the cylinder should be re-honed or replaced. At this time, it costs less to replace the cylinder than to send it out and have it re-honed.
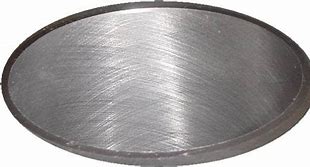
photo courtesy of Precision Surfacing Solutions
Some engines have specific rings for each groove. The rings may be marked. When removing them, take photos and/or carefully examine the ring(s) to be sure you reinstall them correctly (markings up). Use the tip of the ring to clean the lands, even if they appear free of deposits. A used piston ring that has been scored and broken works even better. The deposits are usually burnt oil as a result of using cheap oil and why full synthetic oil e.g. Motul or AMSOIL Dominator should always be used. Sticking rings are always caused by cheap oil and/or engine overheating. Reinstall the piston ring(s). Expand the ring just enough to slip it over the piston and into the groove.
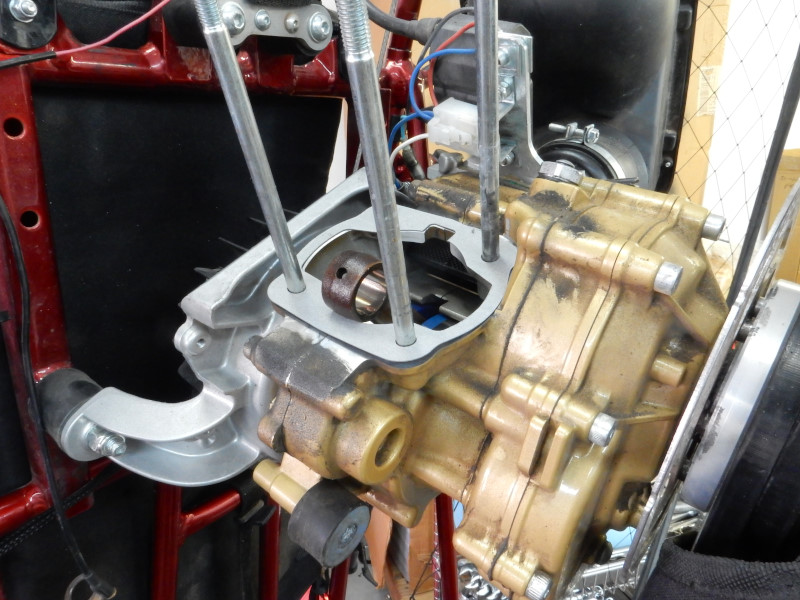
An engine with the entire top end removed.
The upper connecting rod bearing takes a tremendous beating in these engines. What fails is the bottom surface of the wrist pin and then the bearing cage. Once the cage fails, the needle bearing migrate through the engine and destroy most of it.
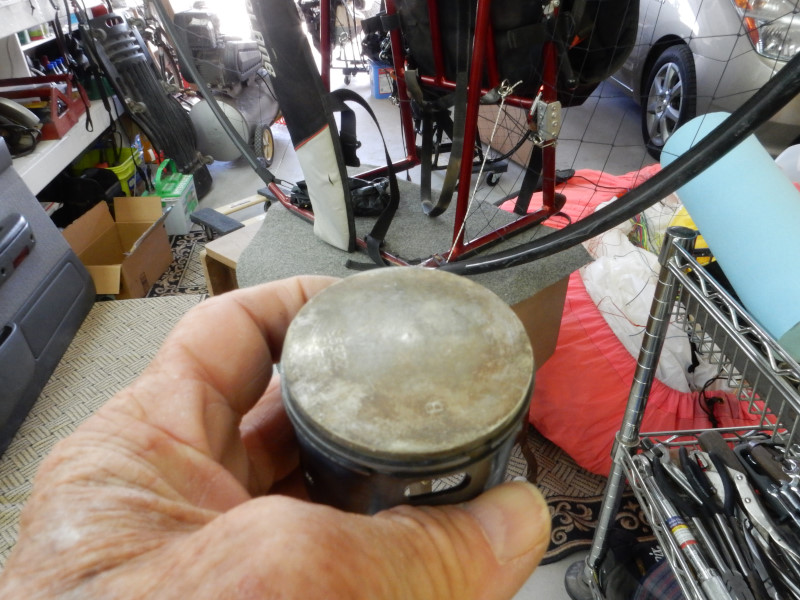
Depending on the fuel used, the top of the piston and the cylinder head will have some or a lot of deposits. MOGAS will leave some or no deposits. If you have a decompression port (DCP), it must be fully open. A clogged DCP adds a great amount of stress to the starter and greatly shortens its life, especially flash starters.
If you remove the piston ring(s) DO NOT reinstall them until you measure the squish and install the correct gasket, if your engine requires that the squish be set. Taking the cylinder head off and on with rings on the piston is a lot more work.
Use a Dremel type tool with a steel wire brush to clean the piston and cylinder head of deposits. This takes a while. Use the special 14mm spark plug hole thread chaser to remove any deposits. Failure to do this can lead to head damage from the spark plug including leaking of the spark plug which can cause severe engine damage.
Install one of the circlips on the side of the piston that faces the front (flywheel) side of the engine. It is blind side, ordinarily, and it is hard to install it on that side. DO NOT USE A TOOL EXCEPT TO GENTLY PUSH THE CIRCLIP IN PLACE. A small screwdriver works well. If you can, use ONLY your fingers to work it in place. This will ensure that the circlip is not deformed in any way. The piston has a small arrow on top which must point to the exhaust port on the cylinder. Note the orientation of the circlip in this photo. If the circlip is installed with the opening to the side, there will be a greater tendency for it to loosen and fall out. Circlips with ears are always easier to install with fingers. The Top 80 circlips do not have ears!
Before installing the piston on the connecting rod, be sure to oil the bearing (use 2 stroke oil), the wrist pin, and the piston rings.
Heat the piston, as above, so that the pin will slide right in. NEVER HAMMER ANYTHING ON THESE ENGINES. Install the second circlip and the cylinder base gasket. Some engines require that the squish be calculated and the appropriate sized cylinder base gasket installed. Note: the Top 80 is very sensitive to the squish value. The Minari gasket kit includes a 2nd gasket in case it is needed to give the correct squish value. When in doubt, use the thickest gasket. Too much squish only lowers performance, too little can wreck the engine.
Use a finger coated with 2 stroke oil to lubricate the cylinder wall and other parts including the piston and rings. You cannot put too much oil on these parts when reassembling the engine.
Install the piston ring(s). Remember that there is a special tang in the ring land that must be lined up with the gap in the ring. A ring compressor is not needed for these small engines. Do not waste money on this tool.
The rest of the installation is fairly straight forward (the reverse of the steps given on the engine rebuilding page).
ALWAYS RETORQUE THE CYLINDER NUTS AFTER THE FIRST FEW HOURS OF FLIGHT. They DO loosen.
![]()

