


Leaking fuel tank caps and problems priming the fuel system
by Had Robinson
updated February 8, 2021
Fuel tanks which leak air are always the result of poor quality control by the manufacturer. Paramotors are expensive and there is no excuse for this but it is what it is and we all have to deal with socialist labor forces in the EU where workers can rarely, if ever, be fired. These engines and peripherals are not made in Japan where workers who do not do their job correctly are publicly disgraced with their families, commit hari-kari, etc. This helps explain why Toyota rules the world when it comes to vehicles, like the Tacoma, which last for decades with minimal upkeep. I spent some time in Japan long ago....
The edges of the fill and vent areas of tanks where they contact the caps and the openings for the various tubes are usually not properly finished. The result is that the tanks leak not only fuel but can be difficult to pressurize with one's breath. The net result can be that pilots have trouble priming the fuel system. Often enough, the tanks quickly get covered with oil and attract dirt and grime.
There is nothing wrong with the concept of a priming system using a tube to pressurize the fuel tank. A primer bulb, on the other hand, adds weight and is another unnecessary point of failure in your fuel system. In addition, all but the most expensive priming bulbs are not resistant to the effects of ethanol that is in most service station gasoline and will quickly harden, crack, and leak – just like many other fuel system components and why we emphasize: IF AT ALL POSSIBLE TO DO NOT USE GASOLINE THAT CONTAINS ETHANOL.
Testing your fuel tank for leaks
The best way is to immerse it in water (just the top of the tank held upside down) and blow into the priming tube to see where the leaks are. DO NOT USE ANY OTHER MEANS TO PRESSURIZE THE FUEL TANK. IT COULD RUPTURE THE TANK. If there are leaks do the following, as appropriate:
- Cap Openings: With a wide file, finish the tank openings until they are perfectly flat and smooth. A block of wood (so it's flat) that is bigger than the tank opening with sandpaper may also be used.
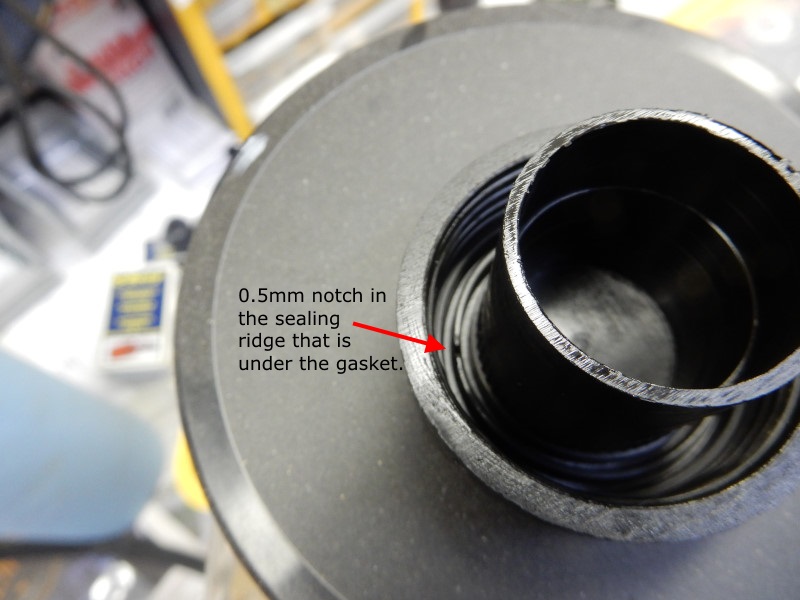
- Caps: Be sure to check inside the caps carefully. I have discovered defects UNDER the cap gasket that caused leaks (see the photo below).
- Tube Opening: Use a file to correct the seam protrusions, if any. With brake cleaner or mineral spirits, thoroughly clean the tube inserts and their openings. If you use the original piece of vinyl tubing, use blue RTV and LIGHTLY coat the inside of openings and the outside of the tubes. Promptly insert them into their respective openings. If you use too much RTV it will plug the openings/tubes that need to be clear, like the priming tube. Make sure the priming tube is lined up properly. Let things sit for a day in order to cure. It is better to use a piece of fuel system hose to replace the cheap tubing supplied by most manufacturers.
- Retest your tank for leaks. Make sure the priming tube is not restricted or blocked with RTV or bits of tank material. If it is, you can use a length of wire to clear it.
- Another way to discover leaks in the fuel system is to just fly the engine a dozen hours. Dust in the air will stick to the oil mixed in the fuel where the leaks are. There are often multiple leaks in the same tank.
The photo below is of a defective Miniplane fuel tank cap. Pilots would never suspect that the reason their fuel tank is leaking and unable to easily hold priming pressure is because of a molding defect that is under the cap gasket. There is a sealing ridge in the base of the cap that goes completely around it. The red arrow points to (1) of (3) gaps I found. The other (2) gaps are not as big as this one but will case leaks, just the same. I looked at other Miniplane caps in our shop and they also had this defect, some more, some less in depth. It is so annoying....
The only fix for this is to smear RTV all over the UNDERSIDE of the cap gasket. You will need a very fine pick to lift out the gasket. Do not get RTV on the TOP side of the gasket. If it smears around the cap where it is visible, a shop towel or cotton swab must be quickly used to wipe off the excess.
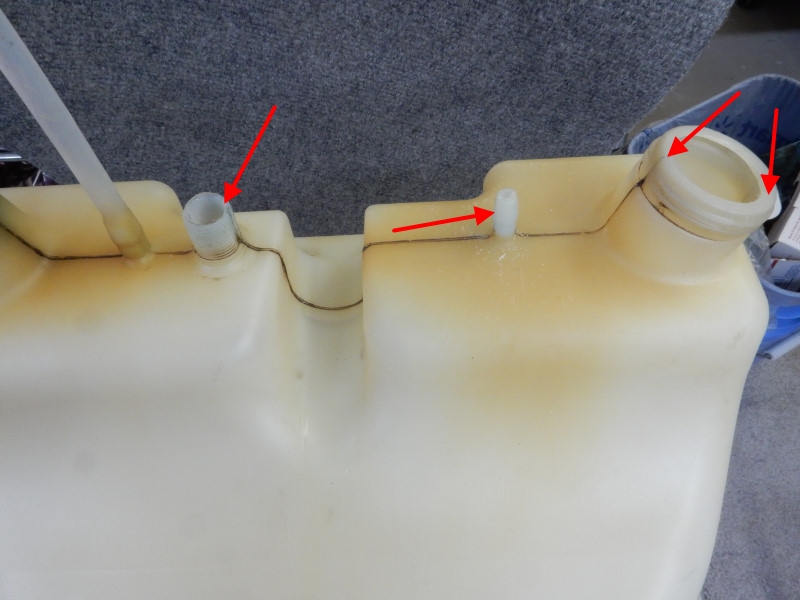
This tank leaked the day it was manufactured and, after a short while, the top of the tank had a thick layer of oil mixed with dirt which (cleaned off before this photo was taken. The far left opening required a counter-sink to smooth the tapered inside of the opening. The middle opening leaked copiously because one of the two seams where the two halves of the tank are joined stuck out about 1mm. A file was used to shave down the protrusion. The far right opening (like the other on the opposite side) had a .5mm crack that leaked. Again, a large flat file was used to cut down the rim of the opening and so eliminate the cracks.
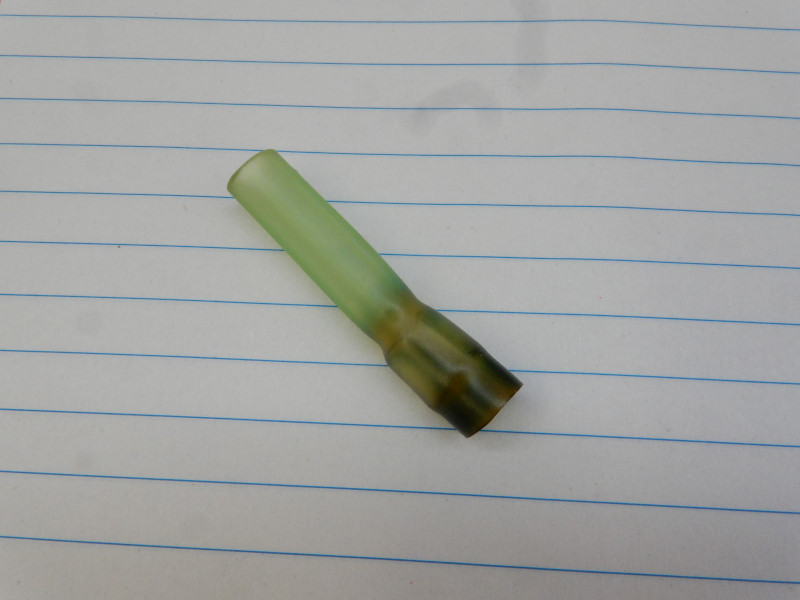
The photo below is the short piece of tubing used to connect the primer tube to the fuel tank. This is from the center opening of the tank above. The tubing is NOT fuel resistant and quickly hardened – and leaked all the more. For another few cents, Miniplane could have used the correct type of tubing. However, even quality fuel emission/fuel line hose would not have fixed the leak, so bad was the malformed center opening in the tank. Ethanol in the gasoline quickly wrecked the tubing pictured here.
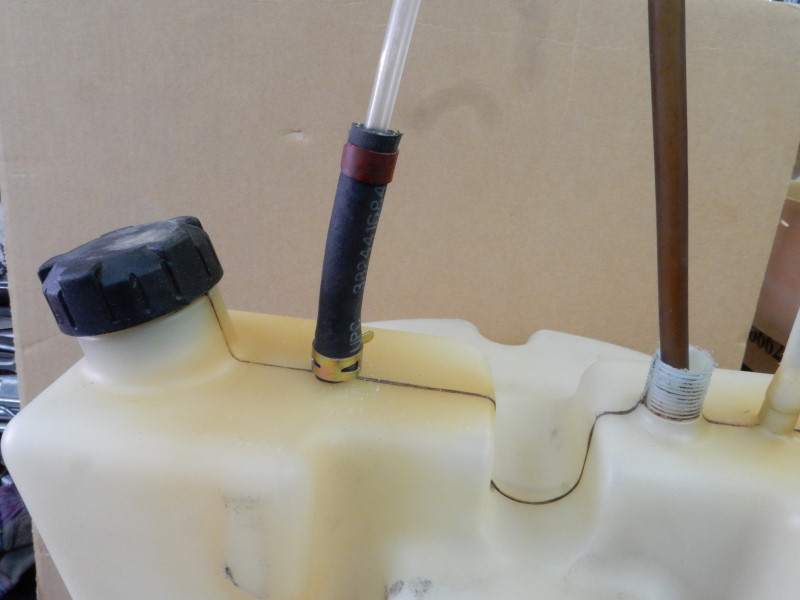
The cheap piece of OEM vinyl tubing was replaced with 3/8" ID SAE fuel system hose and held in place with clamps. The bottom clamp is a 5/16" size and is optional, depending on how carefully the small pipe protruding from the tank was smoothed out. The top clamp must be used because the 6mm tubing is a tiny bit undersized for the 3/8" ID hose.
If all is OK, reassemble everything. Without leaks, the tank will easily pressurize and the carburetor will prime correctly. If you want your engine to start the first time, every time, check out this tip on properly priming a paramotor.
![]()

