
Kiting Practice
By Had Robinson
updated January 9, 2023
Kiting is learning to control the glider while you are on the ground – how to inflate it, keep it overhead, and bring it safely down. Pilots should be able to move around with the glider overhead. Pilots who become expert kiters are the safest and best pilots. Kiting must become second nature. That is, it should be like riding a bicycle. You do not think about how to do it, you just go. Start out in light winds and then progress to high winds of at least 12-15 mph.
If you cannot kite at launch, you should not fly from launch (unless you are launching in "no-wind" conditions at a thermic site).
It is just that simple. Nonetheless, there are times in very strong conditions when you will "plucked" from launch, unable to kite. In fact you might be plucked up facing backwards (put your hands up, go off launch, and sort it out away from the terrain). There are dozens of YouTube vids (including from us) of pilots who run into trouble, sometimes deadly, because they do not have this critical skill.
The same skills used in kiting are necessary in order to launch, fly, and land your glider safely. It also helps the student pilot to start experiencing the sensation of becoming one with the glider – it becomes an extension of your hands and arms. You can greatly advance your early skills by practicing kiting. It can be done almost anywhere, such as a local park, field, or other open space.
Remember: You must always wear a helmet when you are attached to a wing. You can suddenly – without warning – be lifted off the ground by a gust so you must always be prepared. You can use a simple bicycle helmet that is available for under $20 at Wal-Mart.
A. Reverse inflation
Everyone must be perfect in the reverse inflation technique. Steve Crye, a former student of ours, gives a good demonstration of the technique in this video. The only thing I might change is that it is always good to kite at launch for 5 or more seconds because it will give you an idea of what's going on with the air. To turn and – BANG – go can be risky sometimes.
Having the inside A's in one hand and the C's (or D's for older gliders) in the other hand is the only way to safely and completely control a glider in nearly all conditions. Here is the process for successful kiting practice. When at the hill you would only kite for 5-10 seconds before launching.
- Bring the glider up overhead without it diving to the right or left
- Hold it there and kite for a few minutes
- Let go of the risers (NOT the brakes) and turn to face forward
- Kite in the forward position for a minute or so with only the brakes in hand
- Then turn back to face the glider and, finally, bring it down to the ground with complete control. This should be down by grasping A's and C's just after turning back.
- Repeat
B. Moving an inflated glider from point to point
Being able to guide your glider "at will" is also an essential skill. If alone, set up two markers on the ground that are 15 yards apart. The markers should be upwind/downwind of each other and cross to the wind. Practice going from one to the other and touching the marker with your foot. If you have a companion, play "tag".
C. High winds control
When kiting in high winds and the glider is on the ground, remember that you must not only pull on the rear set of risers (the C's or, in older models, the D's) but also add a little bit of pressure on the A risers. The pressure on the A's prevents the wind from getting under the glider and lifting it off the ground.
Can you bring the glider up without being dragged? All pilots should have the goal of being able to kite in 12 mph or higher winds. A secret for bringing a glider up in high winds is to have it rosetted. A sudden pull on the lines when ready will inflate the center of the wing but not the tips. High wind launches can be challenging but not so much if you have perfected your kiting schools from lots of practice.
PRACTICE! PRACTICE! PRACTICE!
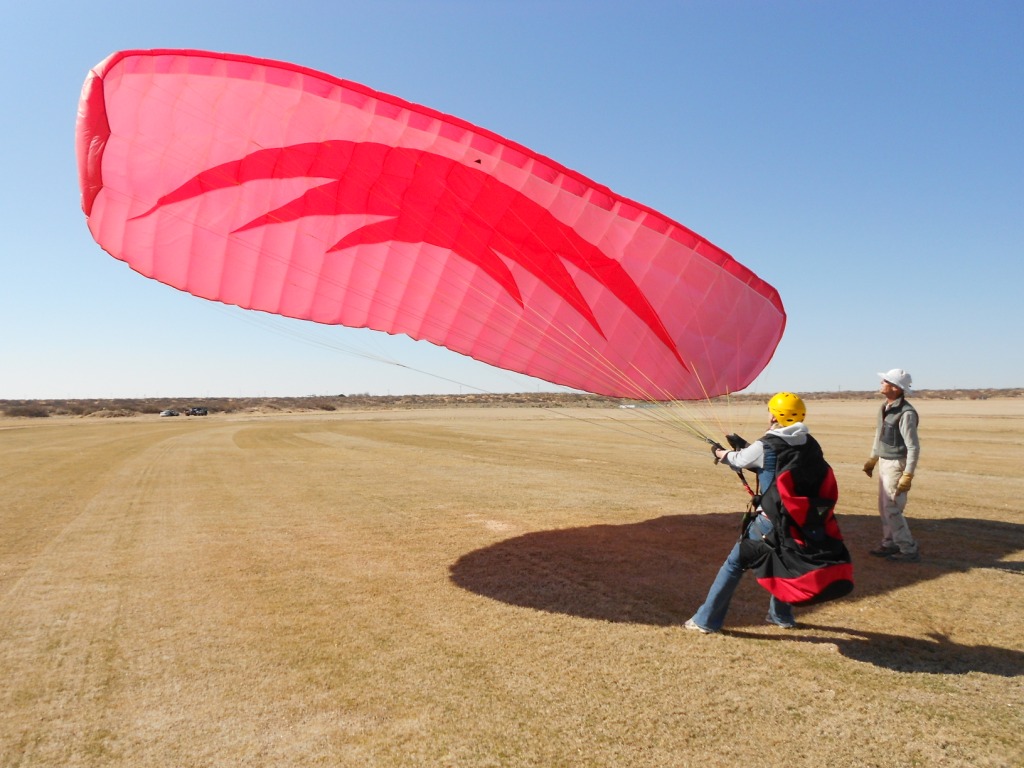
A student being coached on how to handle her glider on the ground. This is the secret to being an expert and safe pilot while in the air.
![]()

